Essential Tools for Getting Started with Candle Making
Candle making is a fun, creative, and rewarding hobby that anyone can try. Whether you’re looking to make beautiful gifts, sell your creations, or enjoy the therapeutic process of crafting something by hand, getting started is easier than you might think! To help you on your journey, we’ve broken down everything you need to know about the essential tools, materials, and tips for making candles like a pro.
Why Make Your Own Candles? 🌟
Making your own candles is not just a creative hobby—it comes with a lot of benefits that make it a worthwhile activity for anyone. Whether you’re interested in personalizing your home or finding a relaxing way to spend your time, candle making has something to offer. Here are some reasons why it’s worth giving it a try:
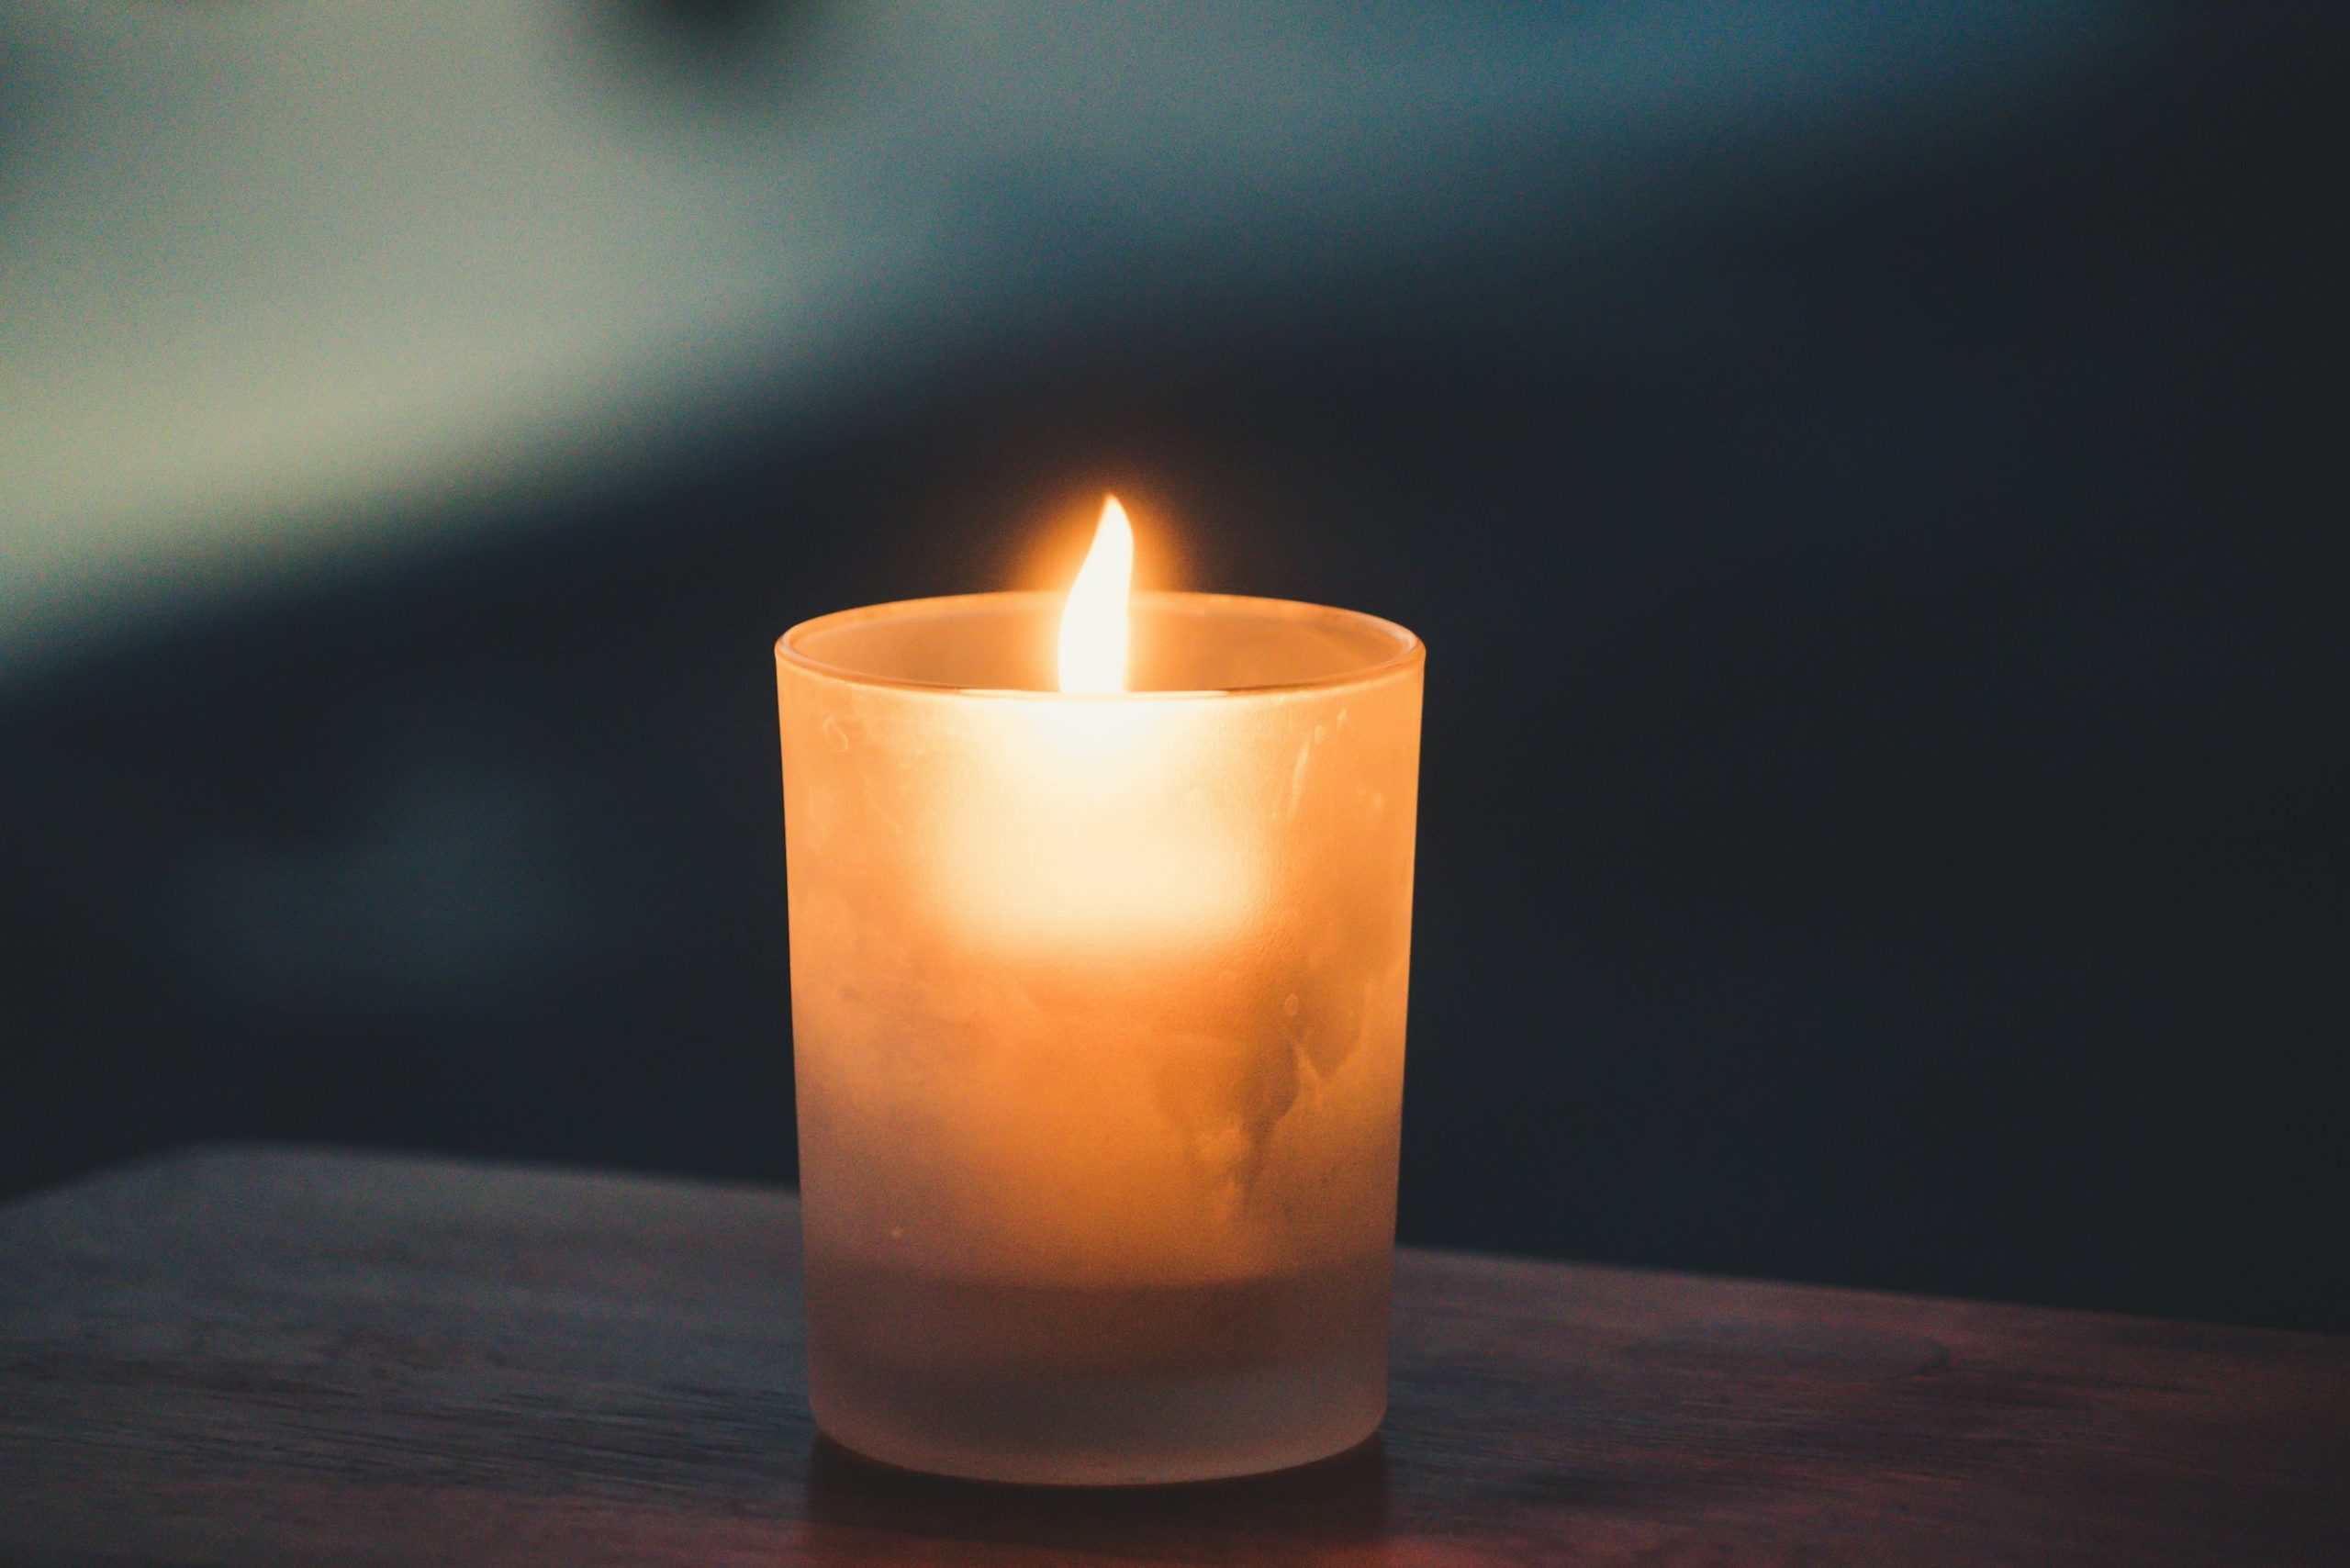
1. Personalization and Creativity 🎨
- Custom Scents: Create candles with your favorite fragrances or experiment with blends to find a unique aroma.
- Tailored Colors and Styles: Match your candles to your home decor, seasonal themes, or personal taste.
- Unique Shapes and Containers: Use molds or jars to make candles that stand out, from classic designs to fun, creative shapes.
2. Cost-Effectiveness 💰
- Store-bought candles, especially high-quality ones, can be expensive. By making your own, you can produce candles that rival premium brands at a fraction of the cost.
- You also save money in the long run by reusing molds, containers, and leftover wax.
3. Eco-Friendly Choices 🌱
- Many commercial candles are made with paraffin wax, which is derived from petroleum. By making your own, you can choose natural options like soy wax or beeswax.
- Reuse containers and reduce packaging waste, making your candles a more sustainable choice.
4. A Relaxing and Therapeutic Hobby 🧘
- The process of melting wax, mixing scents, and pouring candles can be incredibly calming.
- It’s a great way to de-stress after a long day, while also creating something tangible and beautiful.
- Candle making can even be turned into a social activity—perfect for craft nights with friends or family.
5. Gifting Made Easy 🎁
- Handmade candles make thoughtful and personalized gifts for any occasion.
- Add custom labels, tags, or decorative touches to make them extra special.
6. Control Over Ingredients 🛡️
- When you make your own candles, you know exactly what goes into them.
- Avoid harmful additives, artificial scents, or allergens by choosing clean and natural ingredients.
- Ideal for homes with kids, pets, or people sensitive to strong chemicals.
7. A Sense of Accomplishment 🌟
- There’s nothing quite like the feeling of burning a candle you made yourself.
- Seeing your creativity come to life can be incredibly satisfying and even spark a passion for more DIY projects.
Making your own candles isn’t just about saving money or decorating your home—it’s about enjoying the process and creating something meaningful. Whether you’re looking to express your creativity, reduce your environmental impact, or just relax, candle making is an enjoyable and rewarding way to do it.
Essential Tools for Candle Making 🛠️
Getting started with candle making requires some basic tools and supplies. Having the right equipment not only makes the process easier but also ensures your candles turn out looking and burning as they should. Below is a detailed guide to the essential tools for candle making and why they’re important.
Wax Melting Pot or Double Boiler 🍶
One of the first and most important tools for candle making is a wax melting pot or double boiler. These tools ensure your wax is melted safely and evenly, reducing the risk of overheating or scorching. Wax requires a gentle, indirect heat source, as heating it directly over a burner can be dangerous—it may ignite or degrade the wax, affecting your final product.
A melting pot or double boiler system helps maintain consistent control over the wax’s temperature. Proper temperature control is crucial for several reasons:
- Even Texture: Ensures that the wax melts uniformly, avoiding lumps or uneven consistency.
- Scent Preservation: Overheated wax can damage fragrance oils, resulting in a weaker scent throw.
- Safety: Direct heat increases the risk of the wax catching fire, so indirect heating is always the safest option.
A specialized wax melting pot often comes with a spout for easy pouring and is designed to fit over a standard saucepan. If you’re just starting out and don’t want to invest in dedicated equipment, you can create a simple double boiler setup using a heat-safe bowl or glass container over a pot of simmering water.
CandleScience Pouring Pitcher
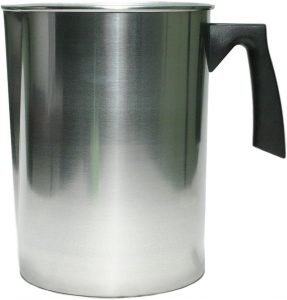
The CandleScience Pouring Pitcher is crafted from stainless steel, making it durable and heat-resistant. Its lightweight design and large capacity (up to 2 pounds of wax) make it suitable for both small and large batches of candles. The spout is designed for precision, ensuring smooth and controlled pouring of melted wax into molds or containers, reducing spills and mess. This pitcher is a staple for candle makers, offering both convenience and reliability.
Wilton Candy Melting Pot
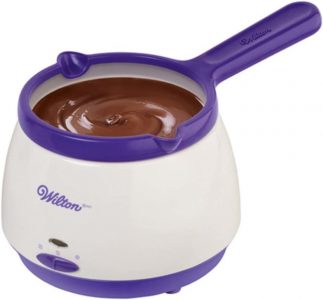
Originally designed for melting chocolate, the Wilton Candy Melting Pot works equally well for small-scale candle making. It features an electric heating system with two temperature settings, allowing you to melt wax evenly without the need for a stovetop. The removable silicone pot is easy to clean and ideal for quick wax changes or experimenting with different colors and fragrances. Its compact size makes it a great choice for beginners or those working in smaller spaces.
Thermometer 🌡️
Temperature control is one of the most critical aspects of successful candle making. A thermometer ensures that your wax is melted and poured at the correct temperature, which affects the texture, fragrance, and overall quality of the finished candle. Without monitoring the temperature, wax can overheat, which may lead to discoloration, degraded fragrance, or even safety hazards.
Candle wax has specific temperature ranges for different stages:
- Melting: Wax should be heated just enough to fully melt without burning.
- Adding Fragrance: Most fragrance oils need to be added at specific temperatures (usually between 170°F and 185°F) to properly bond with the wax.
- Pouring: Pouring wax at the right temperature (often between 120°F and 160°F, depending on the wax type) helps avoid issues like cracks or frosting in the final product.
A thermometer allows you to monitor these temperatures accurately, giving you full control over the process and ensuring professional-quality results.
Taylor Precision Products Candy and Deep-Fry Thermometer

This thermometer is ideal for candle making due to its wide temperature range (up to 400°F) and precise readings. It features a stainless steel body for durability and an adjustable clip to attach it securely to your melting pot. The large, easy-to-read dial allows you to monitor temperatures at a glance, making it suitable for beginners and experienced candle makers alike.
Habor Digital Instant Read Thermometer

This digital thermometer provides fast and accurate temperature readings, ideal for managing the delicate balance of wax heating and fragrance mixing. Its compact design and stainless steel probe make it easy to use, while the digital display ensures clear, precise readings. With a high temperature tolerance, it works well for various types of wax, including soy, beeswax, and paraffin.
- Always clean your thermometer after use to prevent wax residue from affecting future readings. Wipe it with a damp cloth while it’s still warm for easy cleanup.
- When adding fragrance oils, wait until the wax has cooled to the recommended temperature to preserve the oil’s potency and ensure proper bonding.
By investing in a reliable thermometer, you’ll be able to master the finer details of candle making, creating candles with smooth textures, strong scents, and a professional finish. Temperature control is the key to consistent, high-quality results.
Pouring Pitcher 🏺
A pouring pitcher is an essential tool in candle making, designed to hold melted wax and allow for controlled, precise pouring into molds or containers. This simple yet indispensable tool helps prevent spills, ensures an even pour, and makes the entire process more efficient and enjoyable.
Handling hot wax requires a tool that is safe, durable, and easy to maneuver. A good pouring pitcher offers:
- Heat Resistance: Made from materials like stainless steel or heat-safe plastic, pouring pitchers can withstand high temperatures without warping or cracking.
- Precision Pouring: The spout is specifically designed for accuracy, which is essential for small molds or intricate designs.
- Capacity: Most pitchers can hold a substantial amount of wax, reducing the need for constant refilling during larger projects.
- Ease of Use: A sturdy handle ensures a secure grip, even when the pitcher is full and hot.
Using a pouring pitcher also helps maintain a clean workspace by minimizing spills and drips, which can otherwise be a hassle to clean up.
Candle Wicks 🧵
The wick is the heart of your candle. It’s what draws the melted wax to the flame, creating a steady, even burn. Choosing the right wick is crucial to the performance and safety of your candles, as it affects everything from how the candle burns to how long it lasts.
A properly chosen wick ensures:
- Even Burning: Prevents tunneling (a deep hole around the wick) or excessive soot production.
- Flame Stability: A well-sized wick produces a steady flame without flickering or dying out.
- Wax Consumption: Optimizes how the wax melts, ensuring you get the most out of your candle.
- Fragrance Throw: Helps release the fragrance evenly as the wax melts.
Without the right wick, even the highest-quality wax and fragrance oils can result in a poorly performing candle.
Types of Candle Wicks
Cotton Wicks
- Most common and versatile.
- Clean-burning and suitable for a variety of waxes, including soy, paraffin, and beeswax.
- Often pre-waxed and pre-tabbed, making them beginner-friendly.
Wooden Wicks
- Known for their natural crackling sound, reminiscent of a cozy fireplace.
- Create a unique aesthetic and work well with soy wax.
- Best suited for wide-diameter candles or larger containers.
Specialty Wicks
- Hemp Wicks: Eco-friendly and ideal for natural waxes.
- Zinc or Paper-Core Wicks: Sturdy and suited for paraffin candles that require more structural integrity.
Choosing the Right Wick
When selecting a wick, consider the following factors:
- Candle Diameter: Larger candles require thicker or multiple wicks to burn evenly.
- Wax Type: Each wax has unique burning properties, so match the wick to your wax.
- Fragrance Load: Highly scented candles may need a larger wick to handle the fragrance oils.
Using a wick size chart provided by the manufacturer is a great way to find the perfect wick for your project.
ECO Candle Wicks by Candlewic
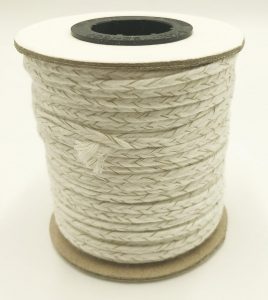
These cotton-based wicks are pre-waxed and tabbed, making them ideal for beginners. ECO wicks are designed for use with soy wax and are known for their clean-burning properties. They produce minimal soot and a stable flame, making them perfect for small to medium-sized candles. Available in various sizes, these wicks ensure you’ll find the right fit for your container.
Crackling Wooden Wicks
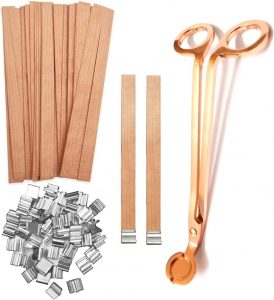
Wooden wicks are an excellent choice for creating a unique sensory experience. These wicks come with metal clips for easy installation and provide a steady, crackling flame. They work best in wider containers and pair beautifully with natural waxes like soy or coconut wax. Their aesthetic appeal makes them a favorite for high-end candles.
- Test different wick sizes and types before committing to a large batch. Every wax and container combination performs differently.
- Center your wick using a wick centering tool, chopstick, or even a clothespin to ensure an even burn.
- Trim your wick to about 1/4 inch before each burn to prevent excessive flame height and soot.
Candle wicks may seem small, but they have a big impact on the performance and appearance of your candles. Choosing the right wick and properly testing it ensures a candle that burns beautifully, releases fragrance effectively, and creates a safe and enjoyable experience.
Molds or Containers 🕳️
Molds and containers play a significant role in shaping your candles and defining their style. Whether you prefer traditional jars, fun shapes, or travel-friendly tins, selecting the right mold or container ensures your candles not only look great but also burn safely and evenly.
The mold or container you choose directly impacts:
- Shape and Style: Determines the final appearance of your candle, from simple pillars to intricate designs.
- Safety: Containers provide a secure, heat-resistant barrier to prevent wax spills during burning.
- Convenience: Containers eliminate the need for additional stands or holders, while molds allow for freestanding candles.
The choice between molds and containers depends on your candle-making goals. Containers are great for beginners due to their simplicity, while molds let you experiment with creative, freestanding designs.
Types of Molds and Containers
Glass Jars
- Popular for container candles, such as scented soy candles.
- Durable, reusable, and available in various sizes and shapes.
- Look for heat-resistant glass to prevent cracking.
Silicone Molds
- Flexible and easy to use, allowing for intricate shapes and designs.
- Ideal for freestanding candles like pillars, figurines, or seasonal themes.
- Easy removal makes them beginner-friendly and reusable for multiple projects.
Metal Tins
- Lightweight and travel-friendly, perfect for making compact candles.
- Commonly used for gift sets or minimalist designs.
- Available with lids, which help preserve scent when not in use.
Plastic Molds
- Affordable and great for beginners experimenting with shapes.
- Typically used for pillars or novelty candles.
- Less durable than silicone molds and prone to wear with repeated use.
Ceramic or Concrete Containers
- Stylish and modern, often used for decorative candles.
- Heavy and durable, offering a unique aesthetic appeal.
- Ensure they are heat-safe and not porous to avoid leakage.
Hearts & Crafts Glass Candle Jars
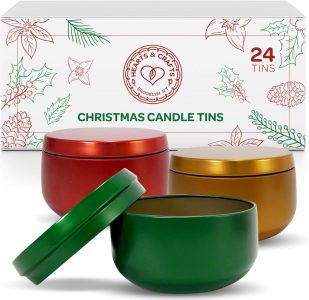
These jars are heat-resistant and versatile, suitable for various wax types like soy and beeswax. With smooth, even walls and a sleek design, they’re perfect for creating classic container candles. The airtight lids help preserve the fragrance when the candle is not in use, making them ideal for long-term storage or gifting.
Milky House Silicone Candle Molds
Made from high-quality, flexible silicone, these molds are perfect for crafting intricate shapes like geometric patterns, flowers, or seasonal figures. Their non-stick surface ensures easy removal, while their durability allows for repeated use without losing shape. Great for creating freestanding decorative candles.
- Prepare Your Molds: For plastic and silicone molds, apply a thin coat of mold release spray or vegetable oil to ensure easy removal.
- Choose the Right Size: Match your mold or container size to your wick. A container that’s too wide may require multiple wicks for even burning.
- Secure Your Wick: For container candles, attach the wick to the base of the container using wick stickers or hot glue before pouring the wax.
- Check for Heat Resistance: Always ensure containers are heat-safe and can withstand the temperature of melted wax.
Molds and containers are not just functional—they’re a creative outlet to bring your candle-making ideas to life. Whether you’re crafting for yourself or creating gifts, the right choice of mold or container adds a personal touch and enhances the final product. With the endless options available, you can let your imagination run wild while keeping your candles safe and stylish.
Wax 🕯️
Wax is the primary ingredient in candle making, forming the foundation of your creation. Choosing the right type of wax is essential, as it affects the candle’s burn time, scent throw, appearance, and eco-friendliness. Each type of wax has its own unique properties, making it important to match the wax to the type of candle you want to create.
The type of wax you select determines several key factors in your candle-making process:
- Burn Quality: Some waxes burn cleanly and evenly, while others may produce soot.
- Fragrance Retention: Certain waxes hold and release fragrance better than others.
- Appearance: The finish of your candle (smooth, frosted, glossy) depends on the wax type.
- Ease of Use: Some waxes are easier to work with, making them better suited for beginners.
- Eco-Friendliness: Natural waxes are more sustainable and produce fewer harmful emissions.
Types of Wax
Soy Wax
- Features: Made from soybean oil, soy wax is natural, renewable, and clean-burning. It has a longer burn time compared to paraffin wax.
- Best For: Container candles, as it has a lower melting point and holds fragrance well.
- Appearance: Provides a smooth, creamy finish with minimal frosting.
- Eco-Friendly? Yes, as it’s biodegradable and sourced from plants.
Beeswax
- Features: A natural wax produced by bees, it has a subtle honey scent and a long burn time. Beeswax also purifies the air by releasing negative ions when burned.
- Best For: Pillar and taper candles due to its sturdy, hard structure.
- Appearance: Smooth with a natural yellowish tint (also available in white, depending on processing).
- Eco-Friendly? Yes, but consider the ethical sourcing of the beeswax.
Paraffin Wax
- Features: A petroleum-based wax that is inexpensive and versatile. It melts quickly and is easy to color and scent.
- Best For: Highly decorative candles with vibrant colors and strong fragrances.
- Appearance: Produces a glossy finish.
- Eco-Friendly? No, as it’s a byproduct of crude oil.
Coconut Wax
- Features: Derived from coconut oil, it’s known for its excellent scent throw and smooth texture.
- Best For: Luxury candles and container candles.
- Appearance: Smooth and creamy with a natural white color.
- Eco-Friendly? Yes, as it’s a sustainable, plant-based wax.
Blended Waxes
- Features: Combines the benefits of multiple waxes, such as soy-paraffin blends or soy-coconut blends, to create a balanced performance.
- Best For: Candles that require specific traits, like stronger scent throw or higher durability.
- Appearance: Varies depending on the blend.
Golden Brands 464 Soy Wax
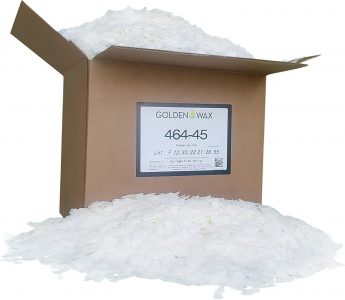
This soy wax is a favorite among candle makers due to its excellent fragrance retention and smooth finish. It has a low melting point, making it easy to work with, and minimizes frosting for a clean, polished look. Perfect for container candles, it’s eco-friendly and biodegradable.
Pastel Beeswax Sheets by Beesworks
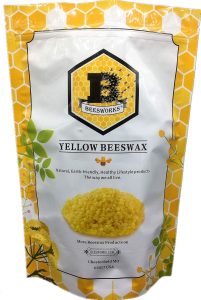
These beeswax sheets are versatile and beginner-friendly, allowing you to roll candles without the need to melt the wax. They’re available in a variety of colors, making them great for decorative or DIY projects. The subtle honey scent adds a natural charm to your creations.
- Measure Carefully: Use a kitchen scale to measure wax accurately based on the size and number of candles you’re making.
- Test Your Wax: Different batches of wax may behave differently. Perform a test pour to ensure the desired result.
- Avoid Overheating: Heating wax beyond its recommended temperature can ruin its properties and cause discoloration. Use a thermometer to monitor closely.
- Store Properly: Keep wax in a cool, dry place to prevent clumping or contamination.
Wax is the backbone of candle making, and understanding its properties is key to creating candles that look, smell, and burn beautifully. Whether you prefer the eco-friendliness of soy wax, the natural charm of beeswax, or the vibrant possibilities of paraffin, there’s a wax type to suit every project and preference.
Fragrance Oils or Essential Oils 🌺
The scent of a candle is what makes it truly memorable. Fragrance oils and essential oils are the key to adding a personal touch to your candles, whether you want something relaxing, invigorating, or seasonally inspired. Choosing the right type of oil and understanding how to use it effectively is essential for creating candles with a lasting and enjoyable aroma.
Adding fragrance oils or essential oils to your candles enhances their appeal and provides a sensory experience that goes beyond just the visual. Scented candles can:
- Set a Mood: Lavender for relaxation, citrus for energy, or vanilla for comfort.
- Personalize Your Candles: Create unique blends that reflect your personality or style.
- Elevate Your Space: Fill your home with delightful, welcoming scents.
However, not all oils are suitable for candle making, so it’s crucial to choose products specifically designed for this purpose.
Types of Oils
Fragrance Oils
Features: Synthetic or blended with natural components, fragrance oils are specially formulated for strong, long-lasting scents in candles.
Advantages:
- Wide variety of scents, including complex blends not available in nature (e.g., pumpkin spice, ocean breeze).
- Consistently strong scent throw in both cold (unlit) and hot (burning) states.
Best For: All candle types, especially when you want unique or bold fragrances.
Essential Oils
Features: Extracted from plants, these are 100% natural and typically more subtle in scent.
Advantages:
- Natural and often associated with aromatherapy benefits.
- Great for eco-conscious or all-natural candles.
Challenges:
- Essential oils are more volatile and may not provide as strong a scent throw as fragrance oils.
- They can be tricky to blend into wax, requiring precise temperature control.
Best For: Natural or therapeutic candles, such as soy or beeswax candles.
How to Use Fragrance Oils and Essential Oils
- Choose the Right Wax: Certain waxes (e.g., soy or coconut) hold scents better than others. Match your oil to the wax for the best results.
- Calculate the Ratio: The general rule is 1 ounce of oil per pound of wax (6-10% fragrance load). Too much oil can affect the candle’s burn quality, while too little may result in a weak scent throw.
- Add at the Right Temperature: For most oils, the ideal temperature is between 170°F and 185°F, which allows the oil to bond with the wax without burning off.
- Stir Thoroughly: Mix the oil evenly into the wax to ensure a consistent fragrance throughout the candle.
P&J Trading Fragrance Oil Set
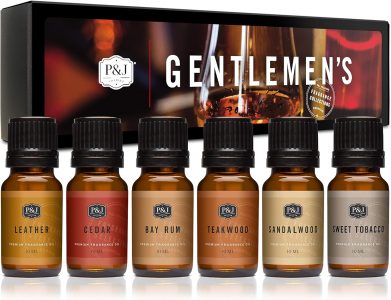
This set offers a variety of high-quality fragrance oils perfect for beginners and advanced candle makers. It includes popular scents like vanilla, lavender, and citrus, allowing you to experiment with different combinations. The oils are formulated specifically for candle making, ensuring a strong and long-lasting scent throw.
Plant Therapy Essential Oils
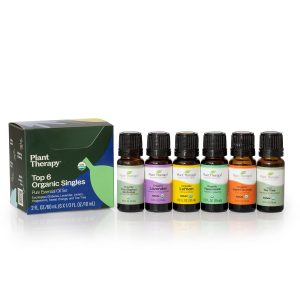
Known for their purity, Plant Therapy essential oils are a great choice for natural candles. Their therapeutic-grade oils, such as eucalyptus, peppermint, and lemon, bring an aromatherapy element to your candles. These oils are highly concentrated, so a little goes a long way.
- Test Your Scent: Before committing to a large batch, make a small test candle to evaluate the fragrance throw.
- Blend Oils for Unique Scents: Combine complementary oils to create custom fragrances, such as vanilla and cinnamon for a cozy winter candle.
- Store Properly: Keep oils in a cool, dark place to preserve their potency and prevent oxidation.
Scented candles are more than just décor—they create atmosphere, trigger memories, and provide comfort. By choosing high-quality fragrance or essential oils and using them correctly, you can craft candles that delight the senses and leave a lasting impression. Whether you’re aiming for bold, complex scents or subtle, natural aromas, mastering the art of scenting your candles takes your creations to the next level.
Dyes and Pigments 🎨
Adding color to your candles is one of the most enjoyable parts of candle making. Dyes and pigments allow you to create candles that are as visually stunning as they are functional. From subtle pastels to bold, vibrant hues, the right coloring can enhance the overall appeal and match the mood or theme of your design.
While a plain white candle can be beautiful, adding color allows you to:
- Personalize Your Candles: Match colors to your home decor, seasons, or special occasions.
- Create Visual Appeal: Bright, bold candles can serve as decorative pieces or gifts.
- Add Thematic Touches: Use specific colors for holidays, events, or branding if you’re selling candles.
Choosing the right type of dye or pigment is essential to ensure even coloring and prevent issues like wax separation or fading.
Types of Dyes and Pigments
Liquid Dyes
Features: Concentrated liquid form, easy to measure and mix into melted wax.
Advantages:
- Produces vibrant, consistent colors.
- Mixes evenly with minimal effort.
- Great for blending custom shades.
Best For: Beginners and anyone looking for easy application.
Dye Blocks or Chips
Features: Solid pieces of concentrated dye, designed to be melted into the wax.
Advantages:
- Long shelf life and easy storage.
- Great for larger batches where precise control over color is less critical.
- Produces rich, deep colors.
Best For: Pillar and container candles, especially for bold colors.
Mica Powder
Features: Fine, shimmery powder that adds a metallic or pearlescent finish.
Advantages:
- Creates a decorative, luxurious appearance.
- Works well for candles used as decorative pieces rather than heavily burned ones.
Challenges:
- Doesn’t fully dissolve in wax, so it’s not ideal for candles with a smooth finish.
- May clog wicks if overused.
Best For: Decorative candles and wax melts.
Natural Colorants
Features: Plant-based or mineral pigments, offering eco-friendly options for natural candles.
Advantages:
- Great for creating earthy tones.
- Complements natural waxes like soy or beeswax.
Challenges:
Limited color options and can fade over time.
Best For: Eco-conscious candles or rustic designs.
How to Use Dyes and Pigments
- Start Small: Always start with a small amount of dye and gradually add more until you achieve the desired shade. It’s easier to darken the color than to lighten it.
- Heat Matters: Add dyes at the right temperature to ensure they dissolve evenly. For most waxes, this is around 170°F to 185°F.
- Mix Thoroughly: Stir the dye into the melted wax until completely blended to avoid streaks or uneven coloring.
- Test Before Pouring: Perform a “spoon test” by letting a small amount of wax cool on a spoon to see the final color, as it will lighten once solidified.
Candle Liquid Dye Set
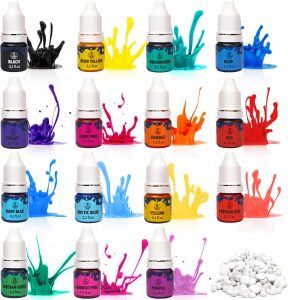
This liquid dye set includes a range of vibrant, easy-to-use colors that mix seamlessly into wax. The precision dropper bottles make it simple to control the intensity of the color, allowing for endless customization. Perfect for beginners and advanced candle makers alike, it works with all wax types.
Soap Shop Mica Powder Set
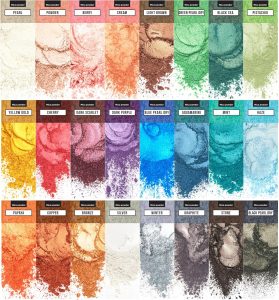
This mica powder set offers a variety of shimmery, metallic shades ideal for decorative candles and wax melts. The fine particles create a luxurious finish and are easy to mix into the wax for stunning visual effects. While not recommended for heavily burned candles, they add a unique flair to display pieces.
- Blend for Custom Colors: Experiment with combining dyes to create unique shades. For instance, mix red and yellow to achieve a warm orange tone.
- Avoid Overloading: Adding too much dye can affect the wax’s burning properties and may clog the wick. Stick to manufacturer recommendations.
- Keep it Consistent: When making multiple candles of the same color, measure your dye precisely to ensure consistency across the batch.
- Store Properly: Keep dyes and pigments in a cool, dry place to prevent clumping or fading over time.
Adding dyes and pigments to your candles allows you to express your creativity and make your candles stand out. With the wide variety of options available, you can craft candles that are not only functional but also visually stunning. Whether you prefer simple pastel tones or dazzling metallic finishes, the right coloring techniques can take your candle-making projects to the next level.
Tips for Getting Started 🚪
Embarking on your candle-making journey can be both exciting and a little daunting. With the right preparation and a few helpful tips, you’ll be crafting beautiful, aromatic candles in no time. Let’s break it down into manageable steps to make your experience smooth and enjoyable.
Set Up Your Workspace
Start by organizing a clean, safe area to work. Choose a flat, heat-resistant surface in a well-ventilated space, such as a kitchen counter or a dedicated craft table. Protect your workspace with old newspapers, parchment paper, or a silicone mat to catch spills. Keep all your tools and materials—like wax, wicks, and a thermometer—within arm’s reach to avoid unnecessary movement while working with hot wax.
Start Small and Simple
If you’re new to candle making, begin with simple projects. Container candles are a great starting point since they don’t require advanced techniques like mold release or shaping. Opt for beginner-friendly materials such as soy wax, which is easy to handle and burns cleanly. Pair it with pre-waxed, tabbed wicks to simplify the setup. Start with small batches to experiment with different colors, fragrances, and designs without wasting materials.
Master Accurate Measurements
Candle making is part art, part science. Measuring ingredients correctly ensures your candles burn safely and smell amazing. Use a kitchen scale to weigh your wax and fragrance oils. As a general rule, add about one ounce of fragrance oil per pound of wax, but always check your wax’s specific guidelines. Too much fragrance can destabilize the wax, while too little might result in a weak scent throw.
Keep an Eye on Temperature
Temperature plays a crucial role in candle making. Melt your wax slowly using a double boiler or wax melting pot to avoid overheating. Use a thermometer to monitor the wax temperature throughout the process. Fragrance oils are typically added between 170°F and 185°F to bond effectively with the wax. Pouring wax at the correct temperature, usually between 120°F and 160°F, prevents issues like frosting or cracking. Patience is key—let the wax cool slowly for the best results.
Test and Experiment
Testing is an important step to ensure your candles perform as expected. Start by making small test candles to evaluate the burn quality and fragrance throw. Match the wick size to your container to avoid tunneling or excessive soot. If something doesn’t work perfectly, take notes and adjust your recipe for the next batch. Candle making is a learning process, so don’t be afraid to experiment.
Practice Safety
Safety should always be a priority. Work in a well-ventilated area to minimize exposure to fumes, and never leave melting wax unattended. Keep a fire extinguisher or baking soda nearby—water should never be used to extinguish a wax fire. Use heat-resistant containers and tools to prevent accidents, and handle hot wax with care to avoid burns.
Final Thoughts 🌟
Candle making is more than just a craft—it’s a blend of creativity, science, and personal expression. Whether you’re creating candles to decorate your home, give as thoughtful gifts, or even sell as part of a small business, the process is rewarding and full of possibilities.
One of the most important things to remember is that candle making is a learning experience. Your first candles might not be perfect, and that’s okay! Testing, experimenting, and refining your techniques will help you improve with each batch. Start with the basics—like soy wax container candles—and gradually expand into more complex projects as your confidence grows.
Don’t underestimate the importance of preparation. Setting up a safe, organized workspace and having all your tools and materials ready can make the process smoother and more enjoyable. Take the time to measure your ingredients accurately, monitor temperatures closely, and allow your candles to cure properly. These small steps make a big difference in the quality of your final product.
Safety is also a critical part of candle making. Always handle hot wax with care, work in a well-ventilated area, and have safety equipment like a fire extinguisher or baking soda nearby. A little caution goes a long way in ensuring your projects are both enjoyable and hazard-free.
Perhaps most importantly, have fun and be creative! Candle making is a fantastic way to express yourself. Play with colors, experiment with unique fragrance blends, and try different container styles or molds. The candles you create will not only be functional but also reflect your personality and vision.
Remember to document your process in a notebook or journal. Keeping track of your recipes, techniques, and results helps you learn from each project and create consistent, high-quality candles in the future. Over time, you’ll develop your own unique style and methods.
Finally, enjoy the journey. Candle making offers a chance to relax, create, and enjoy the satisfaction of crafting something beautiful with your hands. Whether you’re lighting a candle during a quiet evening at home or sharing your creations with others, the joy of making candles will always shine through.
